Samsung has started to roll out the new ZSDMB4 Android 4.1.2 Jelly Bean update for Galaxy Tab 2 7.0 (GT-P3110). The new update has many new features like multi window, 4.2 Keyboard with Swipe feature, new customizable notification Panel. This is the official firmware from Samsung and currently the update is rolling out in phases. But the below tutorial you can manually update your Galaxy Tab 2 7.0 (GT-P3110) with the latest firmware ZSDMB4 Android 4.1.2 Jelly Bean.
No root or ClockworkMod custom recovery required to install this update on your Galaxy tab. In this tutorial you will let you know how to update Galaxy Tab 2 7.0 P3110 to ZSDMB4 firmware. Before starting the update process, remember some things that this update is only for Galaxy Tab 2 7.0 (GT-P3110) users and don’t try this update on any other device.
ZSDMB4 Android 4.1.2 Official Firmware Details:
Android Version: 4.1.2 – Build JZO54K
PDA: P3110ZSDMB4
CSC: P3110TGYDMB4

NOTE:- Use these instructions at your own risk. We shall not hold any responsibility or liability. Make sure that you have the latest Samsung USB Drivers installed on your PC and Enable USB Debugging option from the Android Development menu. (Read Here :– How To Enable USB Debugging Mode in Android Devices)
How to update Galaxy Tab 2 7.0 P3110 to ZSDMB4 Android 4.1.2 firmware
Step 1. Take the full backup of your Galaxy tab with these free applications.
Step 2. Download the latest USB drivers for Galaxy tab on your desktop, so that you can connect the phone to the computer.
Step 3. Download Android 4.1.2 Jelly Bean P3110ZSDMB4 firmware on your computer and extract the file on the desktop, you need this file to update you device, so save it some safe place.
Step 4. After downloading the firmware on your desktop, now download the latest version of ODIN on your computer.
Step 5. Now Turn of your Galaxy Tab and enter into download mode. Press and hold the Volume Down + Home buttons together, and then press the Power button till you see the construction Android robot and a triangle. Press Power again to confirm to enter into Download Mode.
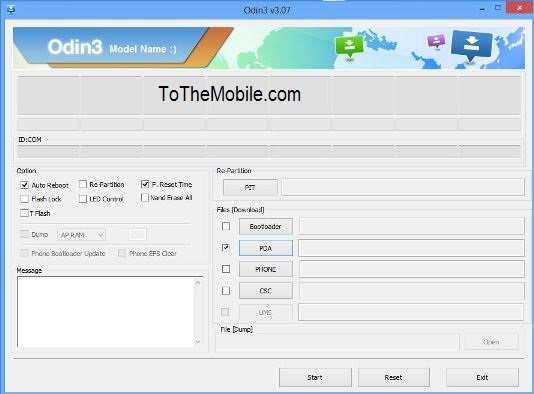
Step 6. Now connect your Galaxy tab with the computer and run the ODIN application on your desktop to install the firmware on your device. If the device is connected successfully, one ID:COM boxes will turn yellow after some time.
Step 7. Now Select the files that you have to flash/install on your Galaxy Tab 2.7.0. These files are to be found from the extracted files in Step 3.
ODIN

Click on ‘PDA’ and select file with ‘CODE’ in its name.
Click on ‘Phone’ and select file with ‘MODEM’ in its name. Ignore this step if there is no such file.
Click on ‘CSC’ and select file with CSC’ in its name. Ignore this step if there is no such file.
Click on ‘PIT’ and select the .pit file. Ignore this step if there is no such file.
Step 8. Now check the Auto Reboot and F. Reset Time options. Don’t check the Re-Partition option, check it ONLY if you selected a .PIT file in the above step. After this click the Start button to install the firmware on your device.
Step 9. Now the installation processes will take some time, after the installation is complete, now you Tab will reboot. When you see the home screen on your tab, unplug your tab from the computer.
That’s it, now your Galaxy tab is updated with the new ZSDMB4 Android 4.1.2 Official Firmware. Hope you like the above tutorial, now don’t forget to like our Facebook page here.
