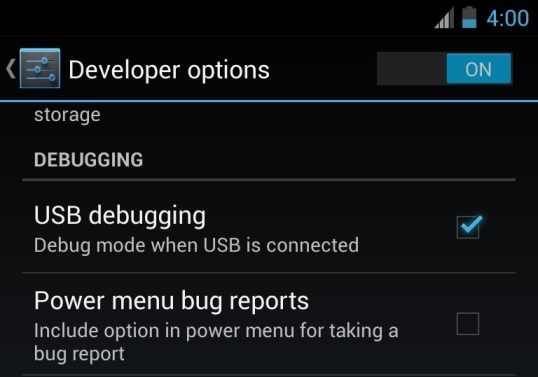
Enable USB Debugging mode allows you to connect your android device to your PC, the main use of this function is to facilitate a connection between an Android device and a computer with Android SDK. With this way you can test live app on your Desktop PC and most of time it is useful to trying out any mods on your device. USB Debugging is also necessary if you ever want to root your Android device or want to install custom ROM on your device. Without enabling USB debugging mode on your device you can’t start the root process.
So today in this tutorial we let you know how you can activate USB debugging mode on your Android mobile phones and tablets.

How to Activate USB Debugging on Android 4.2
Recently Google has changes the USB debugging in Android 4.2 version. Basically the USB debugging mode is only fro developers, so in Android 4.2 they have hidden the entire Developer options setting for people who are not into developing. But you can enable it easily with a simple trick .
1. Go to your Phone Settings > About option.
2. From here you can see the Build number of your device. From here Tap “Build number” seven (7) times continuously and after that your Developer options under Settings are back.
3. Go back to setting and now you can see the new “Developer Option” here. Tap on Developer Option and check USB debugging > Ok.
That’s it now USB debugging is enable on Android 4.2 devices.
How to Activate USB Debugging on Android 4.0
1. GO to the Phone the Settings.
2. Tap on “Developer options”.
3. Check the option: “USB debugging”.
How to Activate USB Debugging on Android 2.3 or earlier
1. Go to Android device Settings.
2. Now Tap on “Applications”.
3. From the Application menu, go to “Development”.
4. From here check “USB debugging” option.
That’s it, by following above tutorial you can enable USB debugging mode on any Android Device.

1 thought on “How To Enable USB Debugging Mode in Android Devices”
Comments are closed.