Some days back Samsung released the new android Jelly Bean XXDLIB firmware officially to Poland users, if you are on the new XXDLIB Jellybean 4.1.1 and want to root you device. Here is the guide which will help you to do this easily. There are lots of benefits of rooted device, you can check them here.
If you want to try the XXDLIB Jellybean 4.1.1 firmware on your Galaxy S3 GT I9300 international version, than read How to Update Samsung Galaxy S3 with Official Jellybean 4.1.1 XXDLIB Firmware.
After the root you can enjoy lots of rooted app on your Galaxy S #, but don’t forget to take the full backup of your device, check out some great backup apps here.

NOTE:- Use these instructions at your own risk. We shall not hold any responsibility or liability. Make sure that you have the latest Samsung USB Drivers installed on your PC and Enable USB Debugging option from the Android Development menu. (“Settings > Applications > Development > USB debugging”, enable the USB Debugging)
Guide to Root Galaxy S3 GT I9300 on XXDLIB Jellybean 4.1.1 Firmware
1. Download and install Samsung USB Drivers and Latest Version of KIES on your desktop, if already installed than move to step 2.
2. Download the XXDLIB 4.1.1 Rooting Package and Odin on your desktop and extract both the files on your desktop.
3. Turn you Phone off and go to the download mode by pressing the Down volume key+ Home button + press the power button.
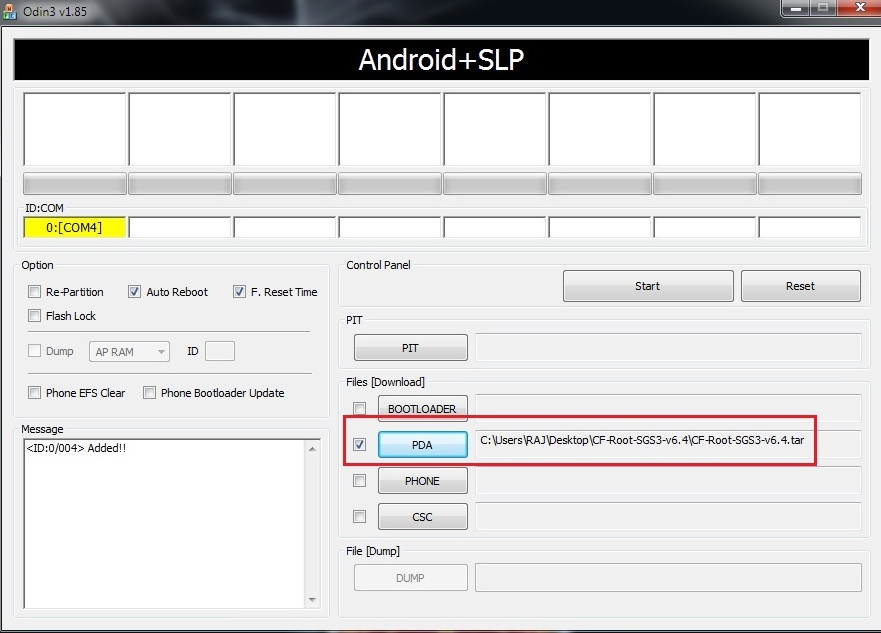
4. Click on PDA in Odin 3 and browse to the “CF-Root-SGS3-v6.4.tar” that you’ve extracted above in step 2. Your Odin should look exactly like this:

5. Now click on start, it will take around 2 – 3 minutes for rooting the device. After the rooted process is complete, the device will be rebooted. Once you see the home screen, you will have to disconnect the device from the computer.
That’s it now the Galaxy S 3 is rooted, if you want to check that your phone is rooted or not, you can do this easily with the free app “Root Checker“
